
-
-
-
-
-
-

With a customized Stiles University course, we can provide expert training for your team, on-location. Whether it's programming, operation or maintenance, we want to help you train your personnel to meet your production goals efficiently and effectively.
-

Experience the trusted workforce development training and machinery knowledge you rely on from Stiles University, now at your convenience. With technology changing every day and new methods being developed constantly, Stiles University Online has the latest information and training content available at your fingertips.
-
-
-

Do you want to produce more efficiently? Processes and flows are key. We optimize these together with you, re-organize them and make sure that you reduce your lead time and save costs. This enables you to implement customized manufacturing and achieve your business goals.
-
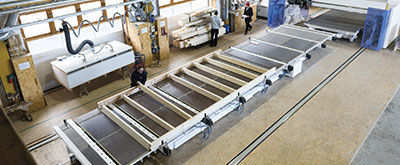
Industrialized construction is evolving. Automation, robotics and advanced technology are raising the level of productivity, efficiency and precision for builders in North America.
-
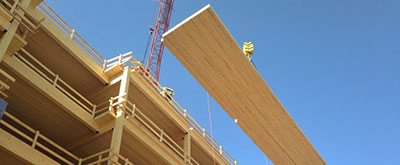
Stiles Machinery is at the forefront of providing technology and machining for producing high quality mass timber. Automated solutions for your mass timber production can increase your manufacturing quality and productivity.
-

Project management services from Stiles make it easy to streamline your entire project— from concept and consultation to integration and implementation.
-

-
-
-
-
-
-
With a customized Stiles University course, we can provide expert training for your team, on-location. Whether it's programming, operation or maintenance, we want to help you train your personnel to meet your production goals efficiently and effectively.
-
Experience the trusted workforce development training and machinery knowledge you rely on from Stiles University, now at your convenience. With technology changing every day and new methods being developed constantly, Stiles University Online has the latest information and training content available at your fingertips.
-
-
-
Do you want to produce more efficiently? Processes and flows are key. We optimize these together with you, re-organize them and make sure that you reduce your lead time and save costs. This enables you to implement customized manufacturing and achieve your business goals.
-
Industrialized construction is evolving. Automation, robotics and advanced technology are raising the level of productivity, efficiency and precision for builders in North America.
-
Stiles Machinery is at the forefront of providing technology and machining for producing high quality mass timber. Automated solutions for your mass timber production can increase your manufacturing quality and productivity.
-
Project management services from Stiles make it easy to streamline your entire project— from concept and consultation to integration and implementation.
-
How to Choose a Wide Belt Sander for Your Business?
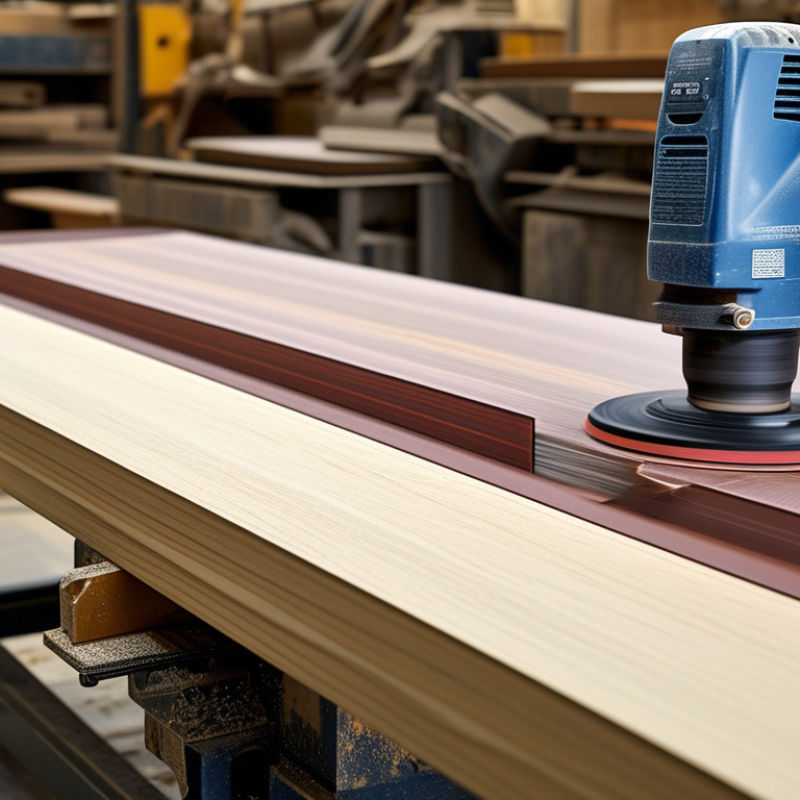
Choosing a wide belt sander is a practical business decision, not merely a search for the lowest price. The right machine must match your materials, production volume, workshop space, and finishing standards. A cabinet shop sanding solid oak needs different capacity than a manufacturer processing thin plywood panels. That difference matters.
Begin with the workpiece. Measure its maximum width, thickness, and length. Then examine the required sanding sequence, abrasive type, feed speed, and removal rate. A 600-millimeter machine may suit smaller furniture parts, while wider production panels require greater working capacity. Check motor power carefully. More power can improve consistency, but it may also increase energy use and maintenance costs. Dust extraction is equally important, because poor collection can reduce visibility, affect finish quality, and create avoidable workplace risks.
Experienced operators also inspect the conveyor, pressure rollers, sanding heads, controls, and replacement parts. Ask suppliers for technical specifications, service response times, training options, and references from similar businesses. A demonstration using your actual wood species can reveal problems that brochures hide. Surface burning, uneven thickness, or excessive vibration should not be dismissed.
No machine is perfect. A cheaper model may seem attractive, yet frequent adjustments can quietly consume labor hours. A premium wide belt sander may offer stronger construction, but its benefits depend on proper setup and regular maintenance. Review total ownership costs, including abrasives, electricity, dust extraction, repairs, and operator training. The best choice is not always the fastest machine. It is the one that delivers repeatable results without placing unrealistic demands on your team. Take time to question your assumptions.
Business Sanding Needs and Material Requirements
How to Choose a Wide Belt Sander for Your Business?
Start with the material. A cabinet shop sanding oak panels needs different settings from a door manufacturer processing soft pine. Identify your usual wood species, panel width, thickness range, and surface condition. Veneer requires controlled pressure and fine abrasive grit, while rough solid timber may need a stronger first pass. Measure the workload. Record daily production, peak orders, and acceptable finishing time. A machine sized only for average demand may struggle during busy weeks.
I once assumed a wider sanding capacity automatically meant better productivity. That assumption was wrong. If your panels are narrow, excessive width can increase energy use and abrasive waste. Review feed speed, sanding head configuration, motor power, and thickness adjustment accuracy. For repeated calibration work, stable thickness control matters more than impressive capacity. Ask for sample sanding with your own materials. Small differences in moisture can change results.
Dust extraction also deserves careful attention. Fine wood dust can reduce visibility, affect surface quality, and create maintenance problems. Check airflow requirements before installation, not afterward. Consider operator access, abrasive replacement time, noise levels, and routine cleaning. Keep written records of grit changes and thickness settings. These details support consistent training and quality checks. Leave room for revision. Your first specification may be incomplete, especially when product sizes or materials change.
| Business Application | Typical Materials | Recommended Abrasive Sequence | Useful Working Width | Typical Stock Removal per Pass | Practical Feed-Speed Range | Main Machine Features | Dust-Extraction Guidance | Best Fit |
|---|---|---|---|---|---|---|---|---|
| Custom woodworking and small-batch furniture | Solid hardwood, softwood, glued panels, and veneered panels | 80–120 grit for calibration; 150–180 grit for finishing | 600–900 mm | 0.3–1.5 mm, depending on wood species and hardness | 4–12 m/min | Adjustable table height, electronic feed control, single or two sanding heads | High-volume extraction with fine-particle filtration; keep airflow balanced across the sanding width | Flexible production |
| Cabinet, door, and panel manufacturing | MDF, particleboard, plywood, melamine-faced board, and solid wood components | 60–100 grit for sizing; 120–180 grit for surface preparation | 1,000–1,300 mm | 0.5–2.0 mm for calibration; lighter cuts on decorative surfaces | 5–15 m/min | Two-head configuration, automatic thickness setting, segmented pressure shoe, quick abrasive change | Use dedicated extraction capacity for MDF and particleboard dust; verify duct diameter and air velocity | Medium-to-high volume |
| High-volume flat-panel production | Raw MDF, particleboard, plywood, and laminated boards | 36–80 grit for heavy calibration; 100–150 grit for leveling | 1,300–1,600 mm | 1.0–3.0 mm per pass when the panel and machine are properly matched | 6–20 m/min | Wide conveyor, high motor capacity, automatic thickness compensation, overload protection, multiple heads | Industrial dust collection with spark-control procedures where required; inspect filters frequently | Continuous production |
| Solid-wood flooring and stair-component production | Oak, maple, ash, beech, pine, and engineered wood flooring blanks | 40–80 grit for flattening; 100–150 grit for intermediate sanding; 180 grit for final preparation | 700–1,300 mm | 0.5–2.0 mm, with reduced removal for thin or profiled components | 4–14 m/min | Rigid conveyor, accurate thickness control, rubber contact roller, optional polishing head | Provide strong extraction for both coarse chips and fine sanding dust; prevent dust buildup around rollers | Repeatable sizing and finishing |
| Door-skin, veneer, and decorative-surface preparation | Wood veneer, plywood, MDF, HDF, painted panels, and coated boards | 120–180 grit for bare surfaces; 180–240 grit for delicate finishing | 1,000–1,300 mm | 0.1–0.5 mm to reduce the risk of sanding through the surface layer | 5–12 m/min | Fine-grit finishing head, segmented platen, pressure control, stable conveyor support | Use clean, dry extraction air and maintain filters to prevent surface contamination | Surface-quality focused |
| Painted, primed, or lacquered panel sanding | Painted MDF, coated wood, primer, lacquer, and filled wood surfaces | 180–240 grit for intercoat sanding; up to 320 grit for selected finishing work | 600–1,300 mm | 0.05–0.2 mm; use a light, controlled cut | 3–10 m/min | Fine abrasive support, precise pressure control, low-vibration conveyor, antistatic options where appropriate | Use filtration suitable for coating dust and follow the coating supplier’s dust-safety requirements | Fine finishing |
| Solid-surface and engineered-board fabrication | Mineral-filled acrylic sheets, compact laminate, fiber-cement board, and engineered panels | 80–120 grit for leveling; 150–240 grit for progressive finishing | 600–1,300 mm | 0.1–1.0 mm, based on filler content, thickness, and surface condition | 3–10 m/min | Corrosion-resistant components, suitable abrasive backing, rigid conveyor, replaceable wear parts | Use extraction designed for fine mineral dust; consider sealed ducting and appropriate respiratory protection | Special-material processing |
| Job-shop and contract sanding services | Mixed wood panels, plastics, composites, and customer-supplied components | 40–240 grit, selected according to the material and required surface finish | 600–1,300 mm | 0.1–2.0 mm with adjustable settings for varied work orders | 3–15 m/min | Broad thickness range, fast setup, recipe storage, accessible maintenance points, versatile head configuration | Size extraction for the highest expected dust load and isolate incompatible dust streams when necessary | Maximum versatility |
Related Posts
-
10 Tips for Choosing the Best Sanding Machine
-

Why You Should Consider a CNC Router for Your Next Project
-
Why Choose C and C Machines for Your Manufacturing Needs?
-
Best CNC Wood Carving Machines for Precision Crafting?
-
Top Wood CNC Machine Benefits for Your Business and Creative Projects
-
Top 10 Wood Carving Machines for Professional and Hobby Use