
-
-
-
-
-
-

With a customized Stiles University course, we can provide expert training for your team, on-location. Whether it's programming, operation or maintenance, we want to help you train your personnel to meet your production goals efficiently and effectively.
-

Experience the trusted workforce development training and machinery knowledge you rely on from Stiles University, now at your convenience. With technology changing every day and new methods being developed constantly, Stiles University Online has the latest information and training content available at your fingertips.
-
-
-

Do you want to produce more efficiently? Processes and flows are key. We optimize these together with you, re-organize them and make sure that you reduce your lead time and save costs. This enables you to implement customized manufacturing and achieve your business goals.
-
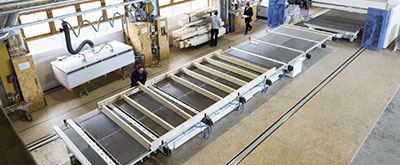
Industrialized construction is evolving. Automation, robotics and advanced technology are raising the level of productivity, efficiency and precision for builders in North America.
-
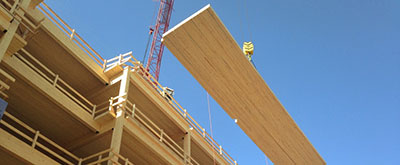
Stiles Machinery is at the forefront of providing technology and machining for producing high quality mass timber. Automated solutions for your mass timber production can increase your manufacturing quality and productivity.
-

Project management services from Stiles make it easy to streamline your entire project— from concept and consultation to integration and implementation.
-


-
-
-
-
-
-
With a customized Stiles University course, we can provide expert training for your team, on-location. Whether it's programming, operation or maintenance, we want to help you train your personnel to meet your production goals efficiently and effectively.
-
Experience the trusted workforce development training and machinery knowledge you rely on from Stiles University, now at your convenience. With technology changing every day and new methods being developed constantly, Stiles University Online has the latest information and training content available at your fingertips.
-
-
-
Do you want to produce more efficiently? Processes and flows are key. We optimize these together with you, re-organize them and make sure that you reduce your lead time and save costs. This enables you to implement customized manufacturing and achieve your business goals.
-
Industrialized construction is evolving. Automation, robotics and advanced technology are raising the level of productivity, efficiency and precision for builders in North America.
-
Stiles Machinery is at the forefront of providing technology and machining for producing high quality mass timber. Automated solutions for your mass timber production can increase your manufacturing quality and productivity.
-
Project management services from Stiles make it easy to streamline your entire project— from concept and consultation to integration and implementation.
-
How to Use a Horizontal Drill Guide?
A Horizontal Drill Guide helps keep a drill bit aligned when a straight-down approach is impractical. It can support controlled drilling into the side of a workpiece, but it cannot correct every setup problem. A stable surface, the right bit, and careful alignment still matter. Small errors show quickly: the bit may wander, the hole may sit off-center, or the guide may shift under pressure. That is why preparation deserves as much attention as drilling.
This introduction uses a fictional tooling specialist, Alex Morgan, for an illustrative quote: “A guide improves alignment; it does not replace a steady setup.” Treat that as a practical principle, not a sourced quotation. The sections ahead explain how to inspect the guide, secure it, align the bit with the mark, and drill with measured pressure. You will also see where common mistakes begin, such as clamping on an uneven face or rushing the pilot hole. Keep the workpiece supported. Check the angle twice. Then proceed slowly. Even experienced users can overtrust a guide, and that is worth remembering.
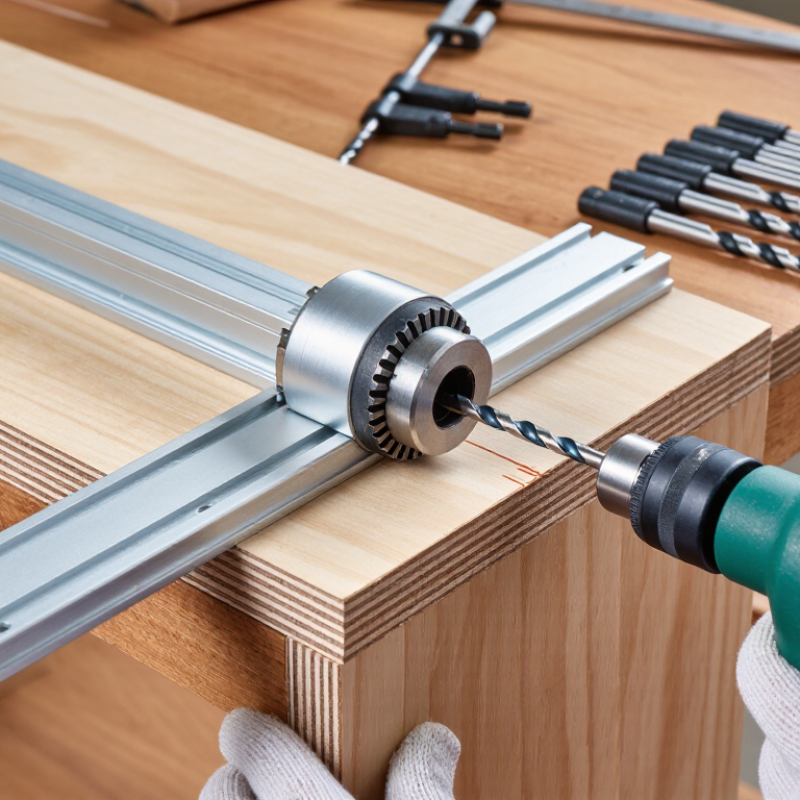
Identify the Horizontal Drill Guide and Its Main Components
A horizontal drill guide helps keep a drill aligned while making holes through the edge or face of a workpiece. Its exact layout varies, but most models share a base, an alignment fence, and a drill bushing. The base rests against the material, while the fence registers against an edge or reference surface. The bushing is a hardened sleeve that supports the bit and limits sideways movement. Small differences matter.
Look for adjustment marks or a scale if the guide sets drilling height or angle. Some designs also include a clamp, depth stop, or replaceable bushings for different bit diameters. Before drilling, check that the guide sits flat and that the bushing matches the bit. A loose fit can let the bit wander. A tight clamp helps, but it should not shift the workpiece out of position. The scale can be misleading if the fence is not seated against a clean edge. I would verify alignment on scrap material; it takes a little time, and the result may still need adjustment. Keep hands clear of the bit path, and inspect the guide for wear or looseness before use.
| How to Use a Horizontal Drill Guide? - Identify the Horizontal Drill Guide and Its Main Components | |||
|---|---|---|---|
| Component | How to Identify It | Main Function | Practical Check Before Drilling |
| Guide body or base | The main frame that rests against or is held on the workpiece. | Supports the guide and keeps the drill aligned with the selected drilling direction. | Check that it sits firmly and does not rock on the workpiece. |
| Drill guide bushing | A hole or metal sleeve through which the drill bit passes. | Helps constrain the bit’s path and reduces sideways movement at the guide. | Use a bushing that fits the intended bit size; confirm the bit turns freely without excessive looseness. |
| Angle-adjustment joint | A pivot, hinge, or angled setting on adjustable guide models. | Sets the drilling angle relative to the workpiece surface. | Set the desired angle and verify it against the guide’s markings or with a suitable angle-measuring tool. |
| Locking knob or clamp | A knob, lever, or clamp associated with an adjustable joint or guide position. | Secures the selected angle or position so it does not shift during drilling. | Tighten it securely by hand and recheck alignment before starting the drill. |
| Reference face or fence | A flat edge or surface that registers against the workpiece. | Provides a repeatable reference for positioning the guide and keeping holes consistently located. | Keep the reference face flush against a clean, straight surface or edge. |
| Workpiece clamp or hold-down | A built-in clamp, strap, or separate clamp used to hold the guide or material. | Limits movement of the guide and workpiece while drilling. | Secure the workpiece and guide without obstructing the drill path. |
| Depth stop (if fitted) | A collar, stop, or adjustable feature that limits how far the bit advances. | Helps control hole depth, especially for blind holes. | Set the stop for the required depth and make a test hole in scrap material when precision matters. |
| Drill bit and drill clearance | The bit is fitted in the drill and passes through the guide opening without contacting the frame. | Creates the hole while the guide helps maintain the intended direction. | Confirm the bit is sharp, properly secured in the chuck, and clear of the guide throughout its travel. |